Gain confidence operating the ESEGAS IR-GAS-600 Portable Syngas Analyzer by following this concise, engaging tutorial. First, you’ll learn vital precautions—like performing zero calibration and handling gas cylinders safely—to protect both yourself and the instrument. Next, explore each accessory and interface, from the sampling pump to the calibration menu, so you can move smoothly between screens. Finally, dive into the clear, five-step calibration routine, complete with flow-rate tips and parameter setup. Along the way, you’ll find lively transitions, industry terms, and actionable insights to make every measurement accurate and stress-free.
1. Instrument Precautions
Before you begin, take these safety steps:
- Zero Calibration FirstAlways air or zero-gas calibrate to lock in reliable baselines.
- This simple act prevents drifting readings right from the start.
- Warm–Up Residuals
- After power-on, ignore initial gas values.
- The device stabilizes residual readings during its short warm up.
- Handle Cylinders Carefully
- Treat calibration gas cylinders as pressure vessels.
- Follow safety regulations to avoid leaks or ruptures.
- Control Flow Rate
- Keep calibration flow at 1 L/min.
- Faster flows can spike pressure and harm sensors.
- Reset If Needed
- If the unit freezes, unplug and reconnect power.
- This quick reboot restores normal function.
2. Standard Accessories
Every component plays a role in accurate readings:
- Gas Inlet & Outlet Tubing
Flexible hoses channel raw and exhaust gas safely. - Gas Pre–treatment Unit
Filters particulates, oil, and moisture before analysis. - RS485 Communication Cable
Enables serial data exchange with external systems. - USB Data Output Cable
Exports logged measurements to your computer. - Power Adapter
Converts 220 VAC to stable 12.6 VDC power. - Instrument Backpack
Shields the analyzer and gear during field transport. - User Manual
Guides you through operation, maintenance, and emergencies.
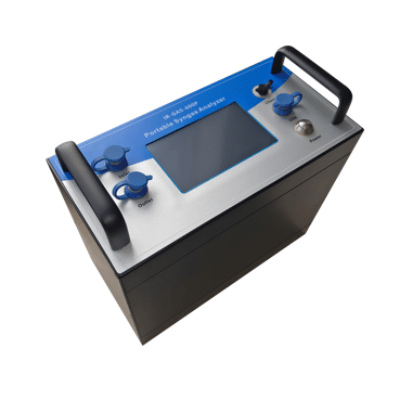
3. Instrument Specifications
A quick reference for your field kit:
- Model: IR-GAS-600
- Size: 270 mm × 133.5 mm × 150 mm
- Weight: ~3 kg
- Ports & Controls:
- Gas Inlet/Outlet
- Power Supply
- USB
- On/Off Switch
4. Interface Introduction
Navigate the device with ease:
- Power–On
Press and hold the power button. A 300 s warm-up shows on screen. - Activate Sampling Pump
Tap the pump icon after warm-up completes. - Measure Interface
View live concentration readings in real time. - Curve Interface
Check gauges of gas levels over time, for trend analysis. - Info Interface
Read detailed gas specs, ranges, and current values. - Calibrate Interface
Enter password (default 9999) to zero or span calibrate. - System Settings
Also under password (9999):- Set time, language, auto-zero, flow rates
- Change calibration and system passwords
- Adjust pre heating and pressure features
- Execute factory reset
- Review historical data
- Configure calorific value parameters
5. Instrument Calibration Procedure
Follow these five clear steps for precise calibration:
- Preparation
- Gather zero gas (nitrogen) and span gas (CO₂).
- Hook nitrogen to the pre-treatment inlet.
- Connect pre-treatment outlet to analyzer inlet.
- Link analyzer outlet to a safe collection chamber.
- Zero Calibration
- Open nitrogen valve; set flow to 1 L/min.
- Wait ~5 min until readings stabilize.
- Use the calibration menu to set the zero baseline.
- Span Calibration
- Switch to CO₂ gas; keep 1 L/min flow.
- After ~5 min, confirm stable readings.
- Input known CO₂ value and span calibrate.
- Parameter Configuration
- Within the calibration menu, adjust:
- Optical path length
- Calibration temperature
- Calibration pressure
- Within the calibration menu, adjust:
- Completion
- Close the gas valve.
- Detach all tubing carefully.
- Your analyzer is now ready for field measurements.
By combining clear steps, human-style language, and industry-standard terms, this tutorial helps you operate the ESEGAS Portable Syngas Analyzer confidently and accurately.
For a full video walkthrough, watch here:
https://www.youtube.com/watch?v=ninWI2sDL0Y